라우터를 구현해 보자
이전에 pubspec.yaml에 go_router를 추가한 것을 바탕으로 하자
main.dart에서 MyApp 부분을 수정하자
처음을 이렇게 만들 수 있다.
void main() {
  runApp(MyApp());
}

class MyApp extends StatelessWidget {
  MyApp({super.key}); // const 지우자
  final router = GoRouter(
    initialLocation: "/login",
    routes: [
      GoRoute(
        path: "/",
        builder: (context, state) => HomeScreen(),
        routes: [
          GoRoute(
            path: "cart/:uid",
            builder: (context, state) => CartScreen(
              uid: state.pathParameters["uid"] ?? "",
            ),
          ),
        ],
      ),
      GoRoute(
        path: "/login",
        builder: (context, state) => LoginScreen(),
      ),
      GoRoute(
        path: "/sign_up",
        builder: (context, state) => SignUpScreen(),
      ),
    ],
  );
경로를 지정해주고 uid에 대해서 변수를 만들어줬다.

이렇게 uid를 만들었다. 이 값은 임시로 설정한 것일 뿐이다.
class MyApp extends StatelessWidget {
  MyApp({super.key}); // const 지우자
  final router = GoRouter(
    initialLocation: "/login",
    routes: [
      GoRoute(
        path: "/",
        builder: (context, state) => HomeScreen(),
        routes: [
          GoRoute(
            path: "cart/:uid",
            builder: (context, state) => CartScreen(
              uid: state.pathParameters["uid"] ?? "",
            ),
          ),
          GoRoute(path: "product", builder: (context, state) => ProductDetailScreen(),),
          GoRoute(path: "product/add", builder: (context, state) => ProductDetailScreen(),),
        ],
      ),
      GoRoute(
        path: "/login",
        builder: (context, state) => LoginScreen(),
      ),
      GoRoute(
        path: "/sign_up",
        builder: (context, state) => SignUpScreen(),
      ),
    ],
  );
일단 이렇게 라우터를 몇개 넣었다.
이제 materialApp에도 라우터를 넣어야 한다.
Widget build(BuildContext context) {
  return MaterialApp.router(
    title: '플러터 마트',
    theme: ThemeData(
      colorScheme: ColorScheme.fromSeed(seedColor: Colors.deepPurple),
      useMaterial3: true,
    ),
    //home: HomeScreen(),  라우터를 사용하면 home 이 사라진다.
    routerConfig: router,
  );
}
이러면 앱을 실행할 때 로그인 화면에서 시작한다.
이제 model 폴더 안에 product 파일을 만들자.
여기서 freezed를 이용하자
아래처럼 파일을 만들고
import 'package:freezed_annotation/freezed_annotation.dart';

part 'product.freezed.dart';

@freezed
sealed class Product with _$Product{
  factory Product({
    String? docId,
    String? title,
    String? description,
    int? price,
    int? stock,
    double? saleRate,
    String? imgurl,
    int? timestamp,
    // 사용할 데이터를 모아놓자
  }) = _Product;
}
터미널을 열어 아래 명령어를 입력하자
flutter pub run build_runner build
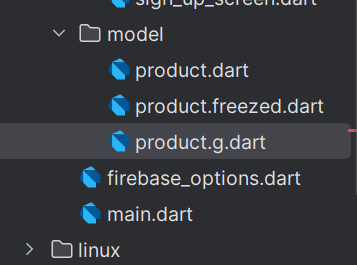
이제 product.freezed.dart 파일이 생길 것이다.
이 과정을 한번 더 거칠 것이다.
import 'package:freezed_annotation/freezed_annotation.dart';

part 'product.freezed.dart';
part 'product.g.dart';

@freezed
sealed class Product with _$Product {
  factory Product({
    String? docId,
    String? title,
    String? description,
    int? price,
    int? stock,
    double? saleRate,
    String? imgurl,
    int? timestamp,
    // 사용할 데이터를 모아놓자
  }) = _Product;

  factory Product.fromJson(Map<String, dynamic> json) =>
      _$ProductFromJSon(json);
}
이 상태에서 아까 실행한
flutter pub run build_runner build를 한번 더 하자
이제 product.g.dart 파일이 만들어진다.
아래에 장바구니 관련 내용도 추가하자
@freezed
sealed class Cart with _$Cart {
  factory Cart({
    String? cartDocId,
    String? uid,
    String? email,
    int? timestamp,
    int? count,
    Product? product,
  }) = _Cart;

  factory Cart.fromJson(Map<String, dynamic> json) => _$CartFromJson(json);
}
flutter pub run build_runner build
이걸 다시 반복하자
새로운 파일 category.dart를 만들고
import 'package:freezed_annotation/freezed_annotation.dart';

part 'category.freezed.dart';
part 'category.g.dart';

@freezed
sealed class Category with _$Category {
  factory Category({
    String? title,
    String? docId,
}) = _Category;

  factory Category.fromJson(Map<String, dynamic> json) => _$CategoryFromJson(json);
}
이처럼 입력하자
flutter pub run build_runner build를 다시 하자

파일들이 생성된다.
'Flutter' 카테고리의 다른 글
| firebase - 배달앱(11) 로그인 기능 구현 (0) | 2024.07.14 |
|---|---|
| firebase - 배달앱(10) 회원가입 기능 구현 (0) | 2024.07.14 |
| firebase - 배달앱(6) 제품 상세 화면 기초 (1) | 2024.07.08 |
| firebase - 배달앱(5) 제품 등록 화면 구현 기초 (0) | 2024.07.07 |
| firebase - 배달앱(4) 홈화면, 사장님 화면 기초 구성 (0) | 2024.07.07 |


