먼저 에뮬레이터를 실행하자

이때 안되면 firebase init을 통해 설정을 한번 다시해주자.
잘 되면 아래처럼 화면이 나온다.

이때 사이트를 들어가면
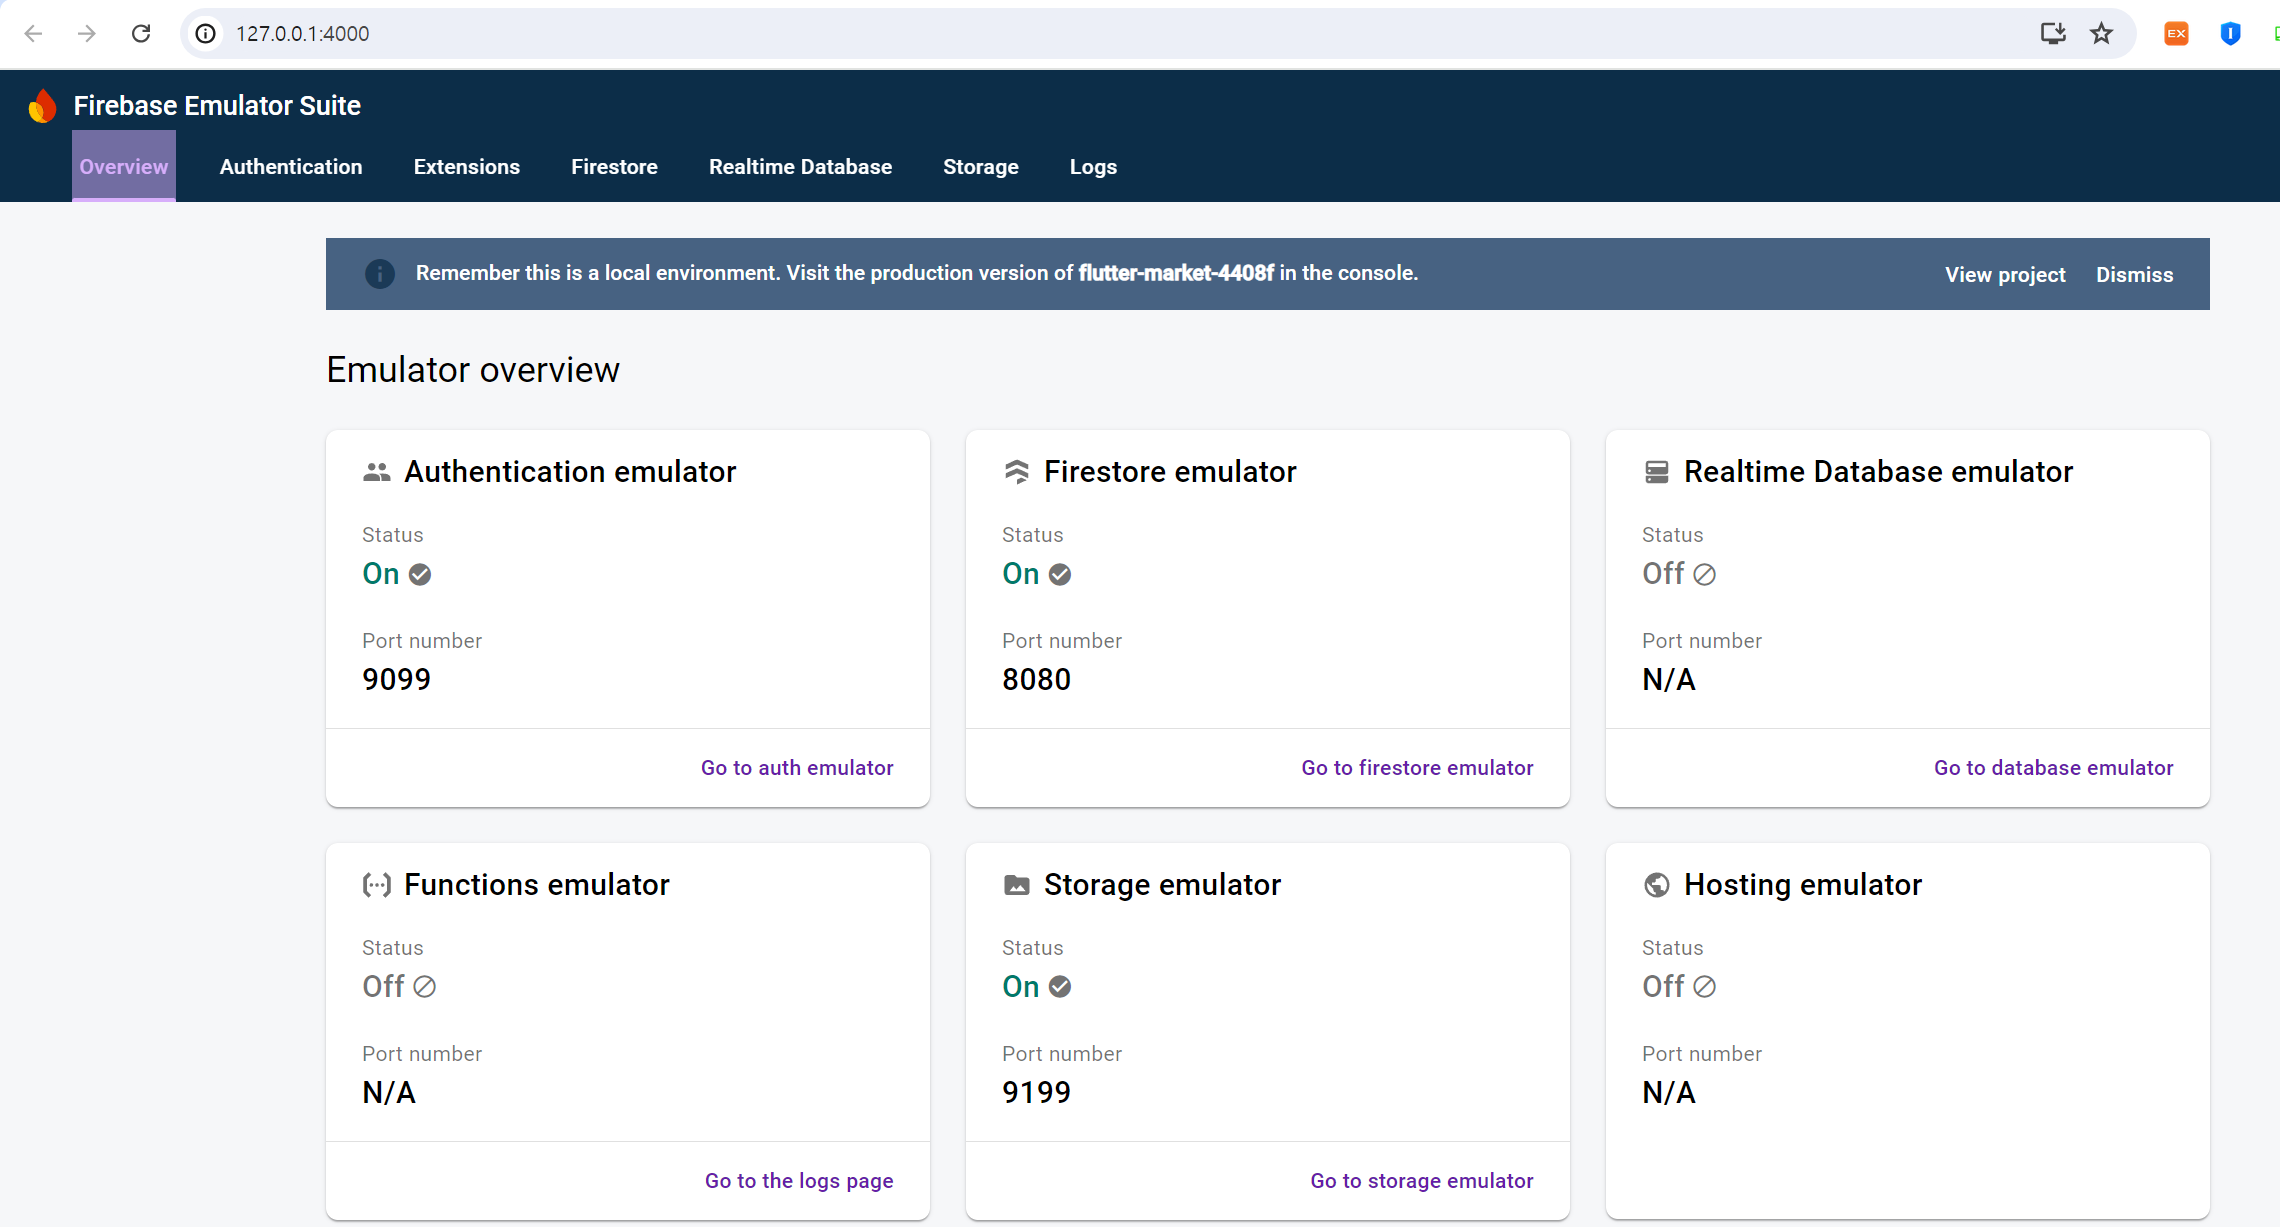
이 화면을 통해 잘 되는지 볼 수 있다.
먼저 로그인 화면에서 회원 가입 기능으로 이동하는 것을 만들자
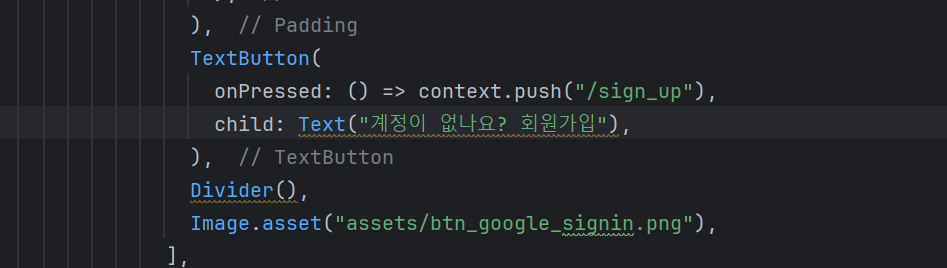
이렇게 한 줄로 이동이 될 수 있다.
이제 회원 가입 화면에 함수를 넣자
final _formKey = GlobalKey<FormState>();
TextEditingController emailTextController = TextEditingController();
TextEditingController pwdTextController = TextEditingController();

Future<bool> signUp(String emailAddress, String password) async {
  try {
    final credential = await FirebaseAuth.instance
        .createUserWithEmailAndPassword(
            email: emailAddress, password: password);
    await FirebaseFirestore.instance.collection("users").add({
      "uid" : credential.user?.uid ?? "",
      "email" : credential.user?.email ?? ""
    });
    return true;
  } on FirebaseAuthException catch(e){
    if(e.code == "weak-password"){
      print("패스워드가 약합니다");
    } else if (e.code == "email-already-in-use"){
      print("이미 정보가 존재합니다");
    }
    return false;
  } catch (e) {
    return false;
  }
}
아래쪽에 회원가입이 잘 되는지 체크를 위해
MaterialButton(
  onPressed: () async {
    // ! 는 null이 아니란 뜻
    if (_formKey.currentState!.validate()) {
      _formKey.currentState!.save();

      final result = await signUp(
          emailTextController.text.trim(),
          pwdTextController.text.trim());
      if (result) {
        if (context.mounted) {
          ScaffoldMessenger.of(context).showSnackBar(
            const SnackBar(content: Text("회원가입 성공")),
          );
          context.go("/login");
        }
      } else {
        if (context.mounted) {
          ScaffoldMessenger.of(context).showSnackBar(
            const SnackBar(content: Text("회원가입 실패")),
          );
        }
      }
    }
  },
  height: 48,
  minWidth: double.infinity,
  color: Colors.red,
  child: const Text(
    "회원가입",
    style: TextStyle(
        color: Colors.white,
        fontWeight: FontWeight.bold,
        fontSize: 18),
  ),
)
로 만들자
이때 화면이 깨질 수 있다.
당황하지 말고 singlechildscrollview를 column 위에 넣자
이제 에뮬레이터를 세팅하자
main.dart로 돌아오자
void main() async {
  WidgetsFlutterBinding.ensureInitialized();
  await Firebase.initializeApp(
    options: DefaultFirebaseOptions.currentPlatform,
  );

  if (kDebugMode){
    try{
      await FirebaseAuth.instance.useAuthEmulator("localhost", 9099);
      FirebaseFirestore.instance.useFirestoreEmulator("localhost", 8080);
      FirebaseStorage.instance.useStorageEmulator("localhost", 9199);
    }catch(e){
      print(e);
    }
  }

  runApp(FlutterMarketApp());
}
이름도 원하는 것으로 수정하고 위 내용들을 넣자.
이렇게 내용을 수정하고
회원가입을 시도하면 오류가 날 것이다.

위처럼 manifest.xml 파일에 usesClearTraffic을 넣자
만약 이러고 안되면
firestore.rules를 수정하자
rules_version = '2';

service cloud.firestore {
  match /databases/{database}/documents {
    match /{document=**} {
      allow read, write: if request.auth != null;
    }
  }
}
이렇게 바꾸자
이제 에뮬레이터에


이렇게 잘 나온다.
'Flutter' 카테고리의 다른 글
| firebase - 배달앱(12) 판매자 화면 구현 (3) | 2024.07.24 |
|---|---|
| firebase - 배달앱(11) 로그인 기능 구현 (0) | 2024.07.14 |
| firebase - 배달앱(9) 라우터 구현 & 데이터 모델 구현 (0) | 2024.07.14 |
| firebase - 배달앱(6) 제품 상세 화면 기초 (1) | 2024.07.08 |
| firebase - 배달앱(5) 제품 등록 화면 구현 기초 (0) | 2024.07.07 |


