class HomeWidget extends StatefulWidget {
  const HomeWidget({super.key});

  @override
  State<HomeWidget> createState() => _HomeWidgetState();
}

class _HomeWidgetState extends State<HomeWidget> {

  late int index;

  @override
  void initState(){
    super.initState();
    index = 0;
  }

  @override
  Widget build(BuildContext context) {
    return Scaffold(
      appBar: AppBar(
        title: Text('flutter 화면 이동하기'),
      ),
      body: homeBody(),
      bottomNavigationBar: BottomNavigationBar(
      type: BottomNavigationBarType.fixed, //이걸 추가하면 항목이 4,5개가 되어도 괜찮다.
        items: [
          BottomNavigationBarItem(icon: Icon(Icons.home), label: 'Home'),
          BottomNavigationBarItem(icon: Icon(Icons.search), label: 'Search'),
          BottomNavigationBarItem(icon: Icon(Icons.person), label: 'User'),
        ],
        currentIndex: index,
        onTap: (newIndex) => setState(() {
          index = newIndex;
        }),
      ),
    );
  }


  Widget homeBody(){
    switch(index){
      case 1:
        return const Center(child: Icon(Icons.search, size: 100,),);
      case 2:
        return Center(child: Icon(Icons.person, size: 100,));
      case 0:
      default:
        return Center(child: Icon(Icons.home, size: 100,),);
    }
  }
}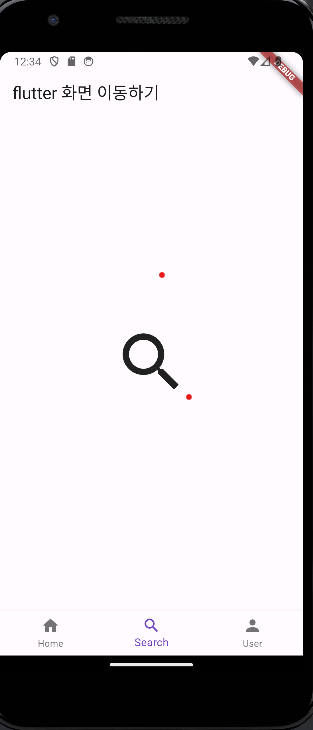
간단한 이동이 가능하다.
'Flutter' 카테고리의 다른 글
| 흔들기 앱 만들기 - 앱 아이콘 설정 (0) | 2024.04.30 |
|---|---|
| 플러터 - 위젯이동(router) (0) | 2024.03.23 |
| 플러터 - 사진 넣기 (0) | 2024.03.21 |
| Flutter - 입력 패턴 (0) | 2024.03.14 |
| 플러터 위젯 - 예시 (0) | 2024.03.13 |


