velocity 패키지를 통해 코드를 더 간결하게 할 수 있다.
$ flutter pub add velocity_x이걸 터미널에 입력해 설치한다.
우리가 패딩을 넣을 때 이렇게 사용한다.
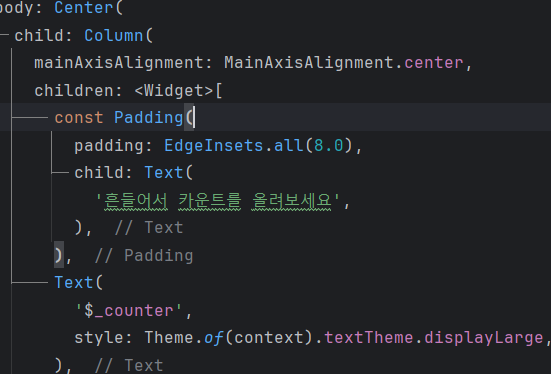
이렇게 만들면 padding 이 복잡하다.
velocity를 사용하면

이렇게 간결하게 p를 붙임으로서 패딩을 넣을 수 있다.
패딩이 생긴 것을 볼 수 있다.

pSymmetric으로도 사용 가능
이런 식으로 빨간 박스를 표현 가능하다.
이게 반복이 된다.
반복되는 부분을 선택하고

ctrl + alt + m 을 누른다.
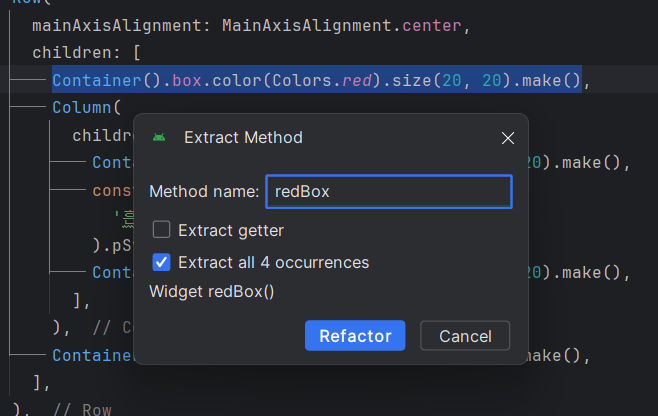
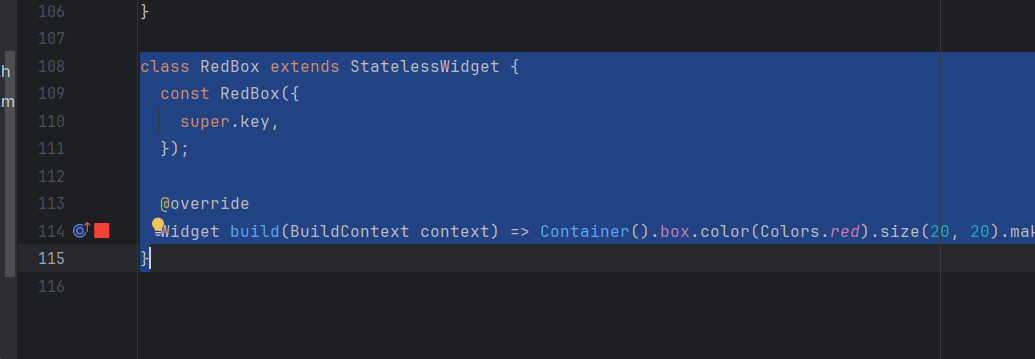
이 코드처럼 redBox가 한개로 묶인다.
import 'package:flutter/material.dart';
import 'package:shake/shake.dart';
import 'package:velocity_x/velocity_x.dart';
class MyHomePage extends StatefulWidget {
const MyHomePage({super.key, required this.title});
final String title;
@override
State<MyHomePage> createState() => _MyHomePageState();
}
class _MyHomePageState extends State<MyHomePage> with WidgetsBindingObserver{ // with로 선언해줘야됨
int _counter = 0;
late ShakeDetector detector;
@override
void initState(){
WidgetsBinding.instance.addObserver(this); // addObserver는 관찰할 대상이 필요하다.
detector = ShakeDetector.autoStart(onPhoneShake: (){
setState(() { // counter가 올라가는 것을 화면에 반영하기 위해서 setState에 넣자
_counter++;
});
},
shakeThresholdGravity: 1.5);
super.initState();
}
@override
void dispose(){
WidgetsBinding.instance.removeObserver(this); //state 가 사라질 떄 lister를 제거해준다.
super.dispose();
}
void _incrementCounter() {
setState(() {
_counter++;
});
}
@override
Widget build(BuildContext context) {
return Scaffold(
appBar: AppBar(
backgroundColor: Theme.of(context).colorScheme.inversePrimary,
title: Text(widget.title),
),
body: Center(
child: Column(
mainAxisAlignment: MainAxisAlignment.center,
children: <Widget>[
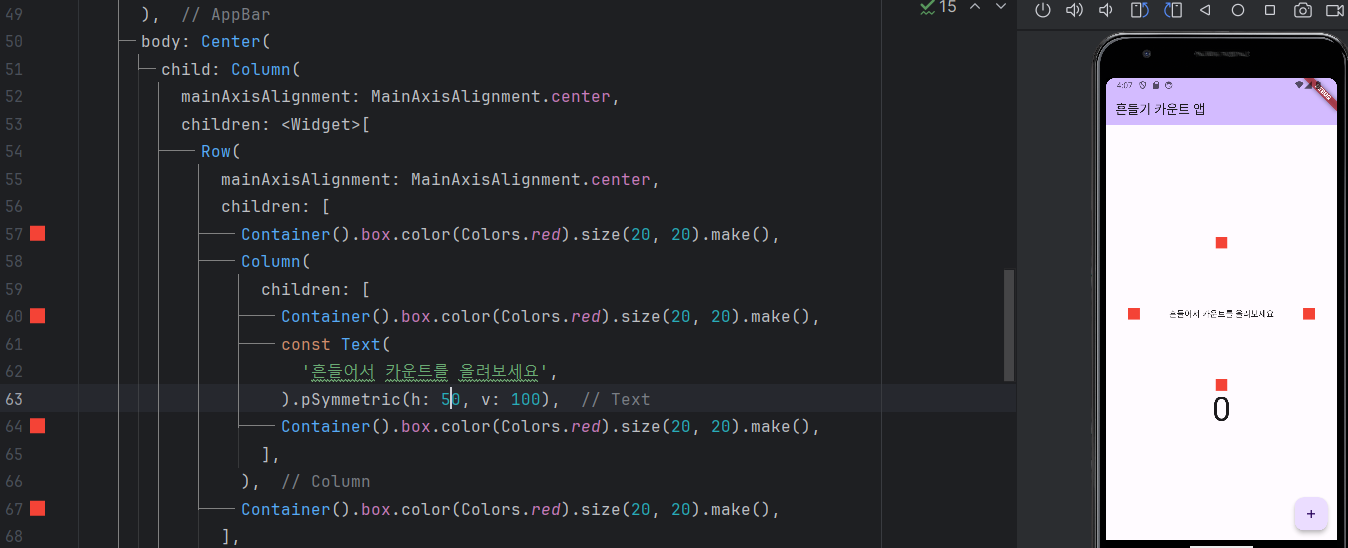
Row(
mainAxisAlignment: MainAxisAlignment.center,
children: [
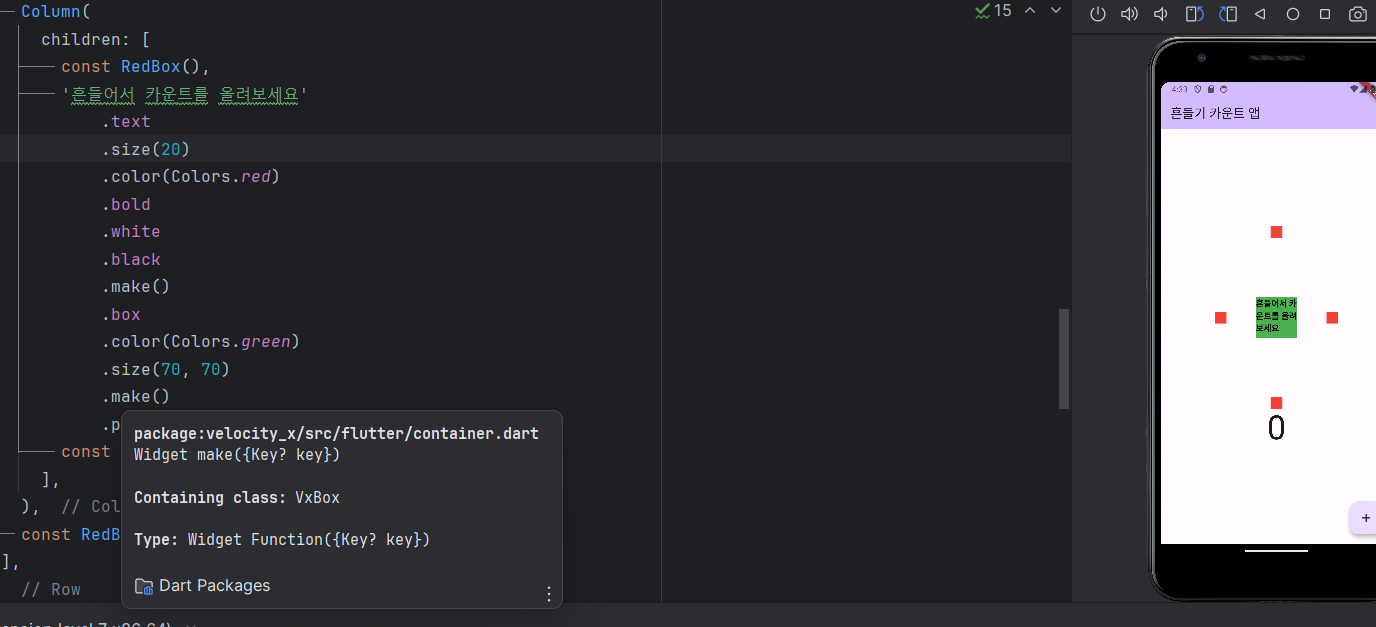
redBox(),
Column(
children: [
redBox(),
const Text(
'흔들어서 카운트를 올려보세요',
).pSymmetric(h: 50, v: 100),
redBox(),
],
),
redBox(),
],
),
Text(
'$_counter',
style: Theme.of(context).textTheme.displayLarge,
),
],
),
),
floatingActionButton: FloatingActionButton(
onPressed: _incrementCounter,
tooltip: 'Increment',
child: const Icon(Icons.add),
), // This trailing comma makes auto-formatting nicer for build methods.
);
}
Widget redBox() => Container().box.color(Colors.red).size(20, 20).make();
@override
void didChangeAppLifecycleState(AppLifecycleState state){
switch(state){
case AppLifecycleState.detached:
break;
case AppLifecycleState.resumed:
// resume 되면 다시 listening이 되도록 한다.
detector.startListening();
break;
case AppLifecycleState.inactive:
break;
case AppLifecycleState.hidden:
break;
case AppLifecycleState.paused:
// 화면 밖으로 나가서 멈춰있는 상태
detector.stopListening();
break;
}
}
}
만약 redBox를 다른 함수에서도 쓰려면 위젯으로 빼내자
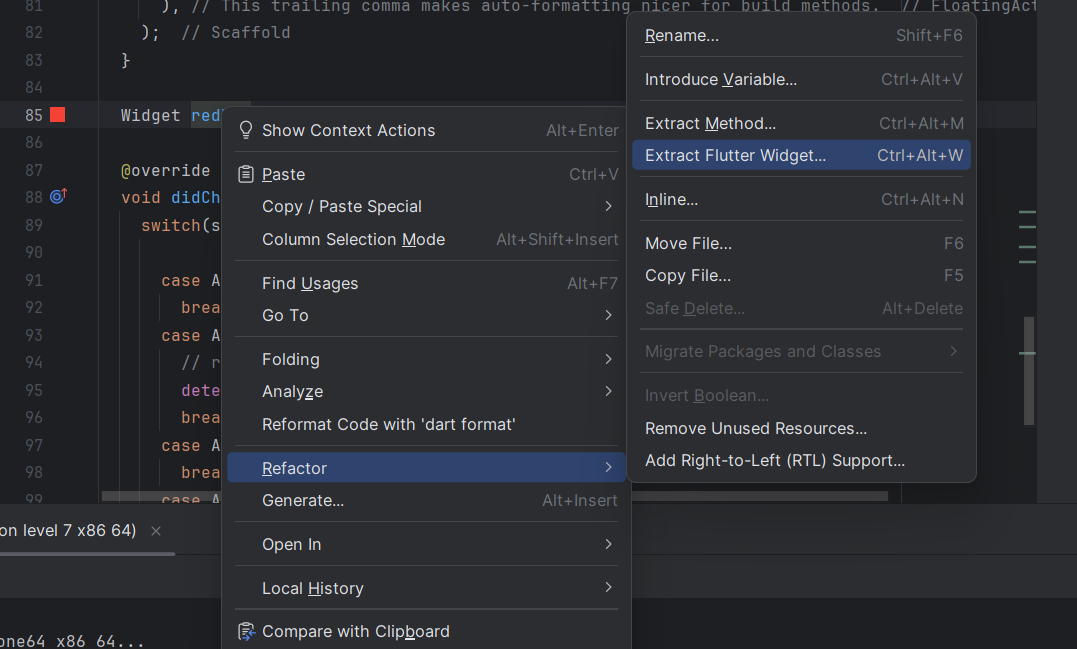

생성된걸 빼서 lib 아래에 red_box.dart로 만든다.

필요한 부분은 import를 해주자
보다보면 노란색 밑줄로 const를 요구하기도 한다.
const 가 없는 것은 빌드 함수가 만들어질 때마다 새로 생성을 하는 것이고
const가 붙으면 미리 다 만들어진 것을 쓰는 것이다.
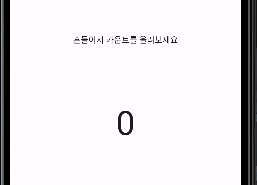
기존의 text에도 velocity를 적용하자

이렇게 text 괄호를 지우고 원하는 텍스트 뒤에 나열을 한다.
이제 ctrl + alt + l로 정렬을 하자
글자 크기가 변했으므로 isIntrinsic을 추가한다.
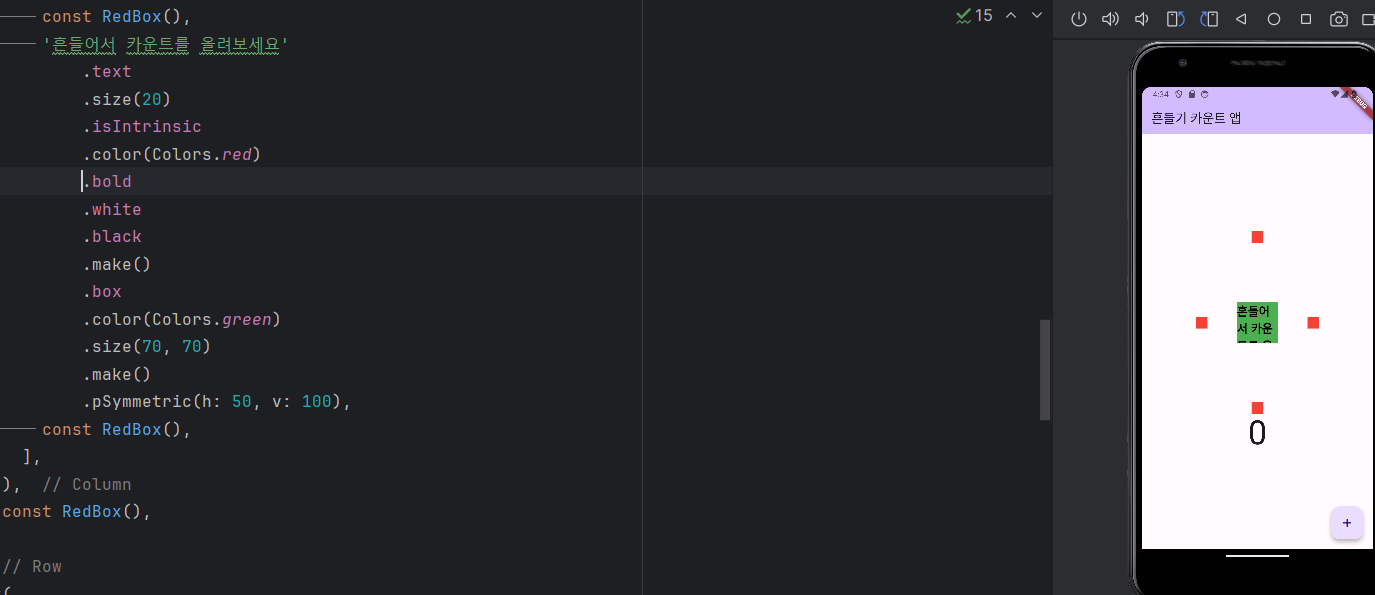
글자 크기가 변했다.

'Flutter' 카테고리의 다른 글
| 토스앱 만들기 - 앱 하단바 만들기 (0) | 2024.05.01 |
|---|---|
| 토스앱 만들기 - 스플래시 화면 작동시키기 (0) | 2024.05.01 |
| 흔들기 앱 만들기 - 패키지 사용하기 (0) | 2024.05.01 |
| 흔들기 앱 만들기 - 패키지 추가하기, 패키지 라이센스 확인하기 (0) | 2024.04.30 |
| 흔들기 앱 만들기 - 앱 아이콘 설정 (0) | 2024.04.30 |


